Dateline: 2 May 2017
 |
| A single tomato plant, thriving inside a solar pyramid. |
I've had a lot of gardening ideas. Some seem clever at first, and hold promise, but end up disappointing me. Then again, some actually work pretty well. Take, for example, Solar Pyramids. They are an idea I developed several years ago, and they work amazingly well.
I explain the story behind my Whizbang solar pyramid idea in my Planet Whizbang Idea Book For Gardeners. For people who don't have the book, and who don't want to spend the money to buy a copy, I sell the chapter about solar pyramids as an inexpensive PDF download.
I am more enthused than ever with my solar pyramid idea after realizing that the unique solar cloches integrate perfectly with my Minibeds-on-Plastic gardening idea. The one difficult aspect of the solar pyramids was that they had to be sealed around the bottom perimeter with soil, but it turns out that is not necessary with minibeds. The minibed frame anchors and seals the bottom of the pyramids just fine.
The solar pyramids that I made, as I'm about to show you (with sewn seams), are no worse for wear after five years of use. The ones that I made by trying to fuse the plastic together with a hot putty knife have not held together.
The translucent superstrong woven poly from Northern Greenhouse Sales is remarkable stuff. It's incredibly durable and long lasting. In fact, I wouldn't be surprised if these solar cones lasted me for more than 20 years. The plastic is UV resistant and it is only outside for a couple months in the spring.
So, I decided to buy a 10'x 12' piece of the superstrong woven poly to make more pyramid covers. I paid $69.60 for the piece, plus $15 for shipping. Total cost: $84.60.
However, to my surprise, the good folks at Northern Greenhouse Sales actually sent me a 12'x 12' piece. And I'm glad they did. I was able to get exactly 8 solar pyramid covers out of the 12' x 12' sheet, and I would have gotten only 6 covers out of the 10' x 12' piece. The point being, if you want optimal yield, order a 12' x 12' sheet.
In the picture above you can see the roll of superstrong woven poly, tape, scissors, and my pattern. I tell how to make a pattern in my Idea Book For Gardeners.
I made that particular pattern back in 2012. When I was done with it, I rolled it up and stuck it in the rafters of my shop. It was pretty dusty and dirty but was still useable, as you can see in this next picture...
The only place I had to lay this all out was on my kitchen table (my workshop is too crowded). I taped the pattern in place...
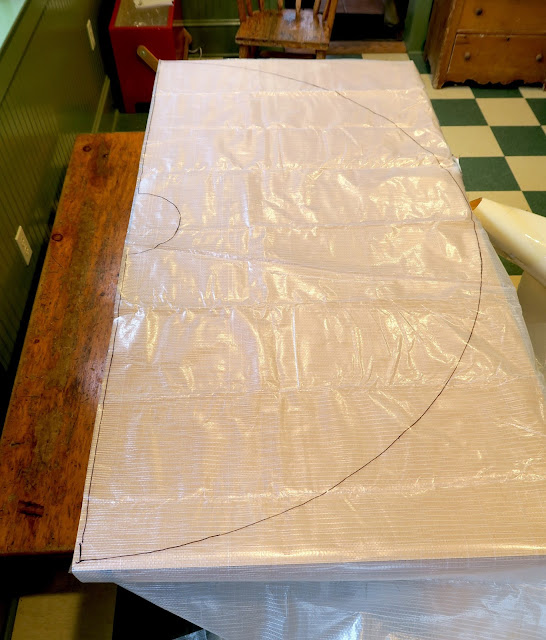
Then I traced around the perimeter of the pattern with a Sharpie marker...
I proceeded to do that seven more times on the sheet of plastic, then I cut the shapes out with a pair of scissors...
Here's a cover on the frame in my kitchen...
Here's a picture of one of the solar pyramid cloches in a Minibed...
Here's a picture of some snow-covered solar pyramids in my Minibeds-on-Plastic garden...
But, while the weather outside was frightful, the environment inside those solar pyramids wasn't so bad at all...
I have all kinds of seeds planted under the solar pyramid cloches.
Stay tuned for more details...
P.S.
I invite you to read about how I think Thomas Jefferson actually invented solar pyramid cloches back in 1812. CLICK HERE to read the story.


I have your planet whizbang book, so I'll double check to see if it's there, but I'm wondering what kind of thread your wife used to sew the edges. Cotton? Nylon?
ReplyDeleteShe used a heavy polyester thread. Something that was on hand. We aren't sure what kind of thread is the best for sewing plastic. But that kid of thread did the job. Older sewn covers don't show any disintegration of the thread.
DeleteMy, what feminine hands you have, Herrick. Haha.
ReplyDeleteMy neighbor decided to replace all his sails on his sail boat and he gave me 3 huge sails. The material is like this only thicker. I'm going to use one for shade on my upper deck and now I have an idea for another one!
ReplyDeleteOh sure... I just bought the idea book, and now you're giving away the information... ha! No worries. Do you use these as a replacement for using a greenhouse and/or coldframes in order to direct sow, or merely to transplant starters earlier?
ReplyDeleteMidsize Mickey—
DeleteThere is much more to the how-to of these solar pyramids than is in this post. I've used the pyramids for direct sowing, for sowing seedlings to transplant later, and to get transplants off to a good start. They are very versatile. I have never had a greenhouse and haven't hd any cold frames for a long time. Solar pyramids will suffice as cold frames.
And there are also many more ideas in your Garden Idea book. Well worth it!
ReplyDeleteA couple of questions: how do you anchor the pyramids to the mini beds~ we have really high winds here on the bald-neked-prairie :] and what would you guess the final price for one pyramid would be?
ReplyDeleteYou are always an inspiration, Herrick.
Thank you.
Very informative line "The translucent superstrong woven poly from Northern Greenhouse Sales is remarkable stuff. It's incredibly durable and long lasting."
ReplyDeleteshed base
Excellent information for gardeners "I am more enthused than ever with my solar pyramid idea after realizing that the unique solar cloches integrate perfectly with my Minibeds-on-Plastic gardening idea."
ReplyDeleteheavy duty tarpaulin