Herrick Kimball Is Now Blogging At Heavenstretch


Dateline: 23 June 2019

I've blogged on this Blogger format for 14 years. Blogger was a good place for me for most of those years. But it has become so problematic that I've been forced leave. My new blogging home is now at WordPress. 

Seeing as I had to move to a new blogging format, I've taken the opportunity to create a new blog name. Heavenstretch is now my place on the web. 


Barring any unforeseen circumstances, Heavenstretch will be my "last blog and testament." 


Please stop on over and see what Heavenstretch is all about...


Illinois Becky's
Inspiring Minibed Garden

Dateline: 28 February 2019
Please note: This is a cross post from 
my new blog, The Deliberate American

Becky's Minibed Garden in 2018
It was late in 2016 when, after decades of trying so many other gardening methods, I developed a new system for gardening. At first, I called it Minibeds-on-Plastic. I now call it Minibed Gardening.

At first glance, Minibed gardening doesn't look like anything all that unique. The casual observer would only see plastic mulch and some small beds. So, what's the big deal?


Well, the big deal is in how the beds are laid out and managed. I call it high-culture. High culture is all about focused attention on the health of the soil, and providing optimum conditions for plants to thrive. There's a lot more to it than meets the eye.


For the past two years I have had a Minibed experimental garden. I have put my initial ideas into practice. I've seen them prove to be sound, productive, and profoundly satisfying.


But what is even more satisfying to me is seeing others take the Minibed gardening idea and put it to good use. Such is the case with the garden in the photo above. Becky M. lives in northern Illinois, about an hour southwest of Chicago (zone 5). She sent me that beautiful photo above with the following comment...

"I bought your garden book and the first update and last year I converted my garden to minibeds.  Wow.  I had a few bumps along the road and I learned from them but for the most part, my 45 mini-beds were a huge success.  I'm 66 with bad knees and the weeding my traditional row garden required almost made me give up gardening completely.  I'm so glad I got your book and took the plunge!"
Becky's Minibed garden puts my garden to shame. Here are a couple more pictures from her first year of Minibed gardening (you can click on the pictures to see enlarged views)...


Here are some "before" photos of the same garden in the spring, after getting the plastic and Minibed frames in place...


And here's a final photo from Becky...


 Now, if all of that doesn't inspire you to get gardening this spring, I don't know what will. 


The way I look at it, gardening is one of the most positive and productive things you can do in a world full of such craziness and uncertainty. 


###

With your Minibed gardening success and satisfaction in mind I have recently (just yesterday) put together a new Minibed gardening resource...


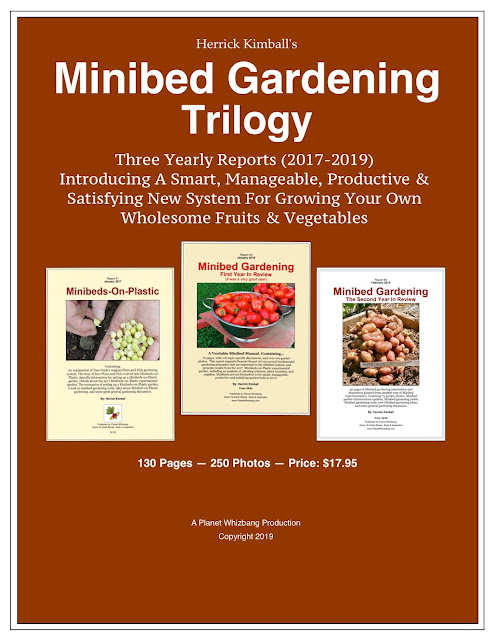
The Minibed Gardening Trilogy is a collection of my yearly Minibed gardening reports (2017-2019). It has 130 pages and 250 photos. It explains the history, the theory, and the best practices of my Minibed gardening system. 


This new resource is formatted as a pdf download. The price is $17.95. But I have put it on sale until March 16 for only $12.95. Click Here to order.


If you want to learn more about the Minibed gardening system before purchasing the Trilogy, Click Here to go to the Minibed Gardening web site.


###

NOTE: If you have purchased the previous yearly reports from me, you already have the first two thirds of this trilogy, and you should have received and e-mail with information about purchasing just the 30-page 2019 Minibed Gardening update (priced at $2.95). If you did not get the e-mail, contact me at  herrick@planetwhizbang.com and I'll send you the details.


Announcing...
"This Agrarian Life"
(My New Vlog)

Dateline: 15 May 2017


Video blogging is now where it's at with savvy online marketing. Whether it's the marketing of ideas or products, more people will pay attention to you if you make a movie and put it on YouTube. 

I've come to terms with that reality, and have now launched a new vlog titled This Agrarian Life. And, of course, every vlog must have it's own web site: www.ThisAgrarianLife.net

This new vlog has been a long time in the thinking. But my thinking was that I would not video blog. The reason being, my lack of technical and stage prowess, along with the amount of time it has taken me in the past to make the few YouTube videos I've managed to crank out.

Written words have always been my strong point anyway. They have served me well. I'm comfortable with words. I'm not naturally inclined to put my live self into the medium.

But I've been feeling that I need to be a little less introverted. And then it occurred to me that the prospect of video blogging was overwhelming to me because I was complicating it. 

What if I just filmed real short clips (less than 3 minutes) of various small-subject things that I've done, or am doing, here on my little homestead? With a single-take, short, focused video, I could eliminate the time-consuming production work of putting the video together.

And, instead of adding a "proper" introduction, with music and all of that, I would just have a 3-second introductory title frame. That would save me even more time.

And, with my spotty, low-bandwidth internet service, I might be able to upload a short video to YouTube in only a couple of hours (instead of overnight, and then some).

So, I made 7 short vlogs last Friday and uploaded them to YouTube over the weekend. With my scaled-down approach, the videos were easy to shoot and produce. And they uploaded to YouTube so much faster than previous (longer) movies I made.

Initial viewer response has been pretty good. I'm encouraged.

I have not thought this vlogging journey out too far into the future. I'm just taking it a vlog at a time. But I hope to make a lot of these mini-movies in the days ahead.

I invite you to join My YouTube Channel and watch all the episodes of This Agrarian Life as they come out. You will find all my YouTube videos at that link. 


Making Whizbang Solar Pyramids
(A Most Excellent Garden Cloche)

Dateline: 2 May 2017

A single tomato plant, thriving inside a solar pyramid.

I've had a lot of gardening ideas. Some seem clever at first, and hold promise, but end up disappointing me. Then again, some actually work pretty well. Take, for example, Solar Pyramids. They are an idea I developed several years ago, and they work amazingly well.


I explain the story behind my Whizbang solar pyramid idea in my Planet Whizbang Idea Book For Gardeners. For people who don't have the book, and who don't want to spend the money to buy a copy, I sell the chapter about solar pyramids as an inexpensive PDF download.

I am more enthused than ever with my solar pyramid idea after realizing that the unique solar cloches integrate perfectly with my Minibeds-on-Plastic gardening idea. The one difficult aspect of the solar pyramids was that they had to be sealed around the bottom perimeter with soil, but it turns out that is not necessary with minibeds. The minibed frame anchors and seals the bottom of the pyramids just fine.

The solar pyramids that I made, as I'm about to show you (with sewn seams), are no worse for wear after five years of use. The ones that I made by trying to fuse the plastic together with a hot putty knife have not held together.

The translucent superstrong woven poly from Northern Greenhouse Sales is remarkable stuff. It's incredibly durable and long lasting. In fact, I wouldn't be surprised if these solar cones lasted me for more than 20 years. The plastic is UV resistant and it is only outside for a couple months in the spring.

So, I decided to buy a 10'x 12' piece of the superstrong woven poly to make more pyramid covers. I paid $69.60 for the piece, plus $15 for shipping. Total cost: $84.60.

However, to my surprise, the good folks at Northern Greenhouse Sales actually sent me a 12'x 12' piece. And I'm glad they did. I was able to get exactly 8 solar pyramid covers out of the 12' x 12' sheet, and I would have gotten only 6 covers out of the 10' x 12' piece. The point being, if you want optimal yield, order a 12' x 12' sheet.


In the picture above you can see the roll of superstrong woven poly, tape, scissors, and my pattern. I tell how to make a pattern in my Idea Book For Gardeners

I made that particular pattern back in 2012. When I was done with it, I rolled it up and stuck it in the rafters of my shop. It was pretty dusty and dirty but was still useable, as you can see in this next picture...


The only place I had to lay this all out was on my kitchen table (my workshop is too crowded). I taped the pattern in place...


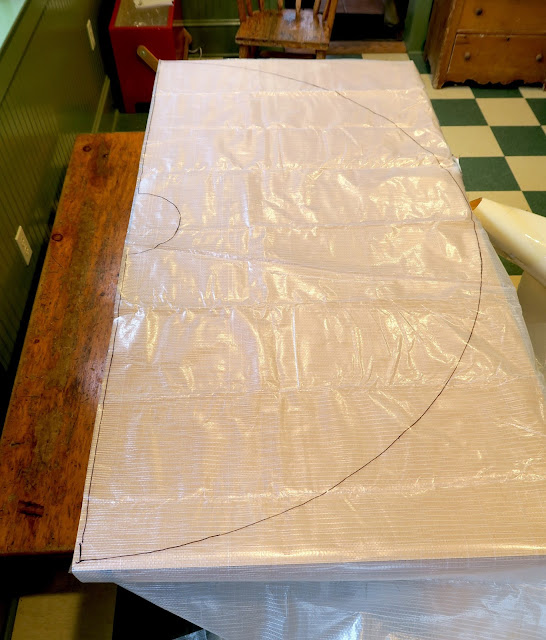
Then I traced around the perimeter of the pattern with a Sharpie marker...


I proceeded to do that seven more times on the sheet of plastic, then I cut the shapes out with a pair of scissors...


The woven poly does not unravel after you cut it. Not at all. It's fused into a solid piece of superstrong material. After the eight pieces were cut out, my wife sewed the seams...


Here are the eight covers all sewed up and ready to use...


Here's a cover on the frame in my kitchen...


Here's a picture of one of the solar pyramid cloches in a Minibed...


Here's a picture of some snow-covered solar pyramids in my Minibeds-on-Plastic garden...


But, while the weather outside was frightful, the environment inside those solar pyramids wasn't so bad at all...


I have all kinds of seeds planted under the solar pyramid cloches.

Stay tuned for more details...

P.S. 
I invite you to read about how I think Thomas Jefferson actually invented solar pyramid cloches back in 1812. CLICK HERE to read the story.


Planting Into A Cover Crop
In The Spring

Dateline: 30 April 2017


This blog post may be the most useful gardening revelation I have ever shared....

If you have read my garden writings for long you know that I became interested in no-till gardening last year, and that I started growing some cover crops in my garden. The picture above is an example of what I mean. The garden bed on the right has a cover crop of oats and the garden bed on the left has a cover crop of mustard. As you can tell by the leaves on the ground, that picture was taken in the fall.

I did not have time to get any cover crops into my Minibeds-on-Plastic experimental garden last year. But, as I explain in my Minibeds-on-Plastic Report, cover cropping and no-till gardening will be an integral part of my whole approach to minibed gardening. So, please keep that in mind as you read this post.

If I were to till a cover crop (like you see in the picture above) into the soil at some point, that cover crop would be a "green manure." But with no-till gardening I'm not interested in expending the effort to till the green manure into the soil.

Rather, my objective is to grow roots underneath the soil and leave them in place. While the plants are alive, the soil ecology interacts with the roots, resulting in a healthy, LIVE soil. When the plants die, the roots in the soil die also and feed the ecology, while the biomass above can be utilized as a mulch, which protects the soil—again promoting life and biological activity in the soil.

Now, the other thing that a cover crop as I've just described it does, and the thing I want to emphasize here, is that it GREATLY improves soil tilth. It makes the soil more "mellow," which is to say, it is more easily worked. And when garden soil is easy to work, especially at planting time in the spring, it is a real joy.

This delightful reality was my recent experience in that oat-seeded bed you see in the picture at the top of this page. Here's a picture of that same bed during a thaw this past winter...


And here is a picture of the oat bed as it looked this spring...


If you look close, you can see some full-size leaves that were captured by the stand of oats in the fall. And I should mention that, as the oats were getting started, I sprinkled some shredded leaves between the rows. So the bed had the benefit of growing oats, along with some leaf mulch.

This next picture shows me digging a furrow into the same bed to plant some onion sets earlier this spring...


What you are seeing in that picture is a soil that is incredibly mellow and easy to dig in. In this case, a picture really doesn't tell the story like I wish it could. Suffice it to say that I have never had a spring-planting soil that was so easy to work in. I simply parted the oat-and-leaf cover and used my Whizbang pocket cultivator to fork a planting furrow under the string line. NEVER have I planted a bed of onions in the spring so easily. 

The soil tilth is far, far better than if I had just put a leaf mulch over it for the winter. I think there is a synergistic soil tilth result that comes with this sort of cover-cropping and no till gardening.

Here, for comparison, is another bed in my garden that had no cover crop, no mulch, and not even an occultation cover. This picture was taken on the same day as the picture above...


That barren bed is hard from exposure to rain and snow for the past few months. It needs some rain to get the pretty-much-lifeless soil into shape so the bed can be cultivated for planting. It will require a lot of WORK on my part, as compared to the bed with the oat cover crop.

The lesson here is clear and powerfully compelling. Cover cropping improves and maintains soil structure. It allows for very easy, no till gardening. I am persuaded more than ever that a system of simple cover cropping, along with no till gardening, in manageable minibed "islands", surrounded by an ocean of black plastic mulch, will make for a very successful Minibeds-on-Plastic gardening system. 

But the proof will come with my Minibeds-on-Plastic experimental garden as I commence to plant and tend the beds this first year of the experiment. Stay tuned for that.

Before I end this post, here's a picture of my garden taken a couple days ago. It is actually a picture of one of my elderberry bushes that I have bush-planted, as explained (for raspberries) in my Planet Whizbang Idea Book For Gardeners. There are strings tied from each elderberry cane to the post.

The onion bed I wrote about above is visible in the background. I have planted three other beds (including that one with the hard, dead soil) to spring cover crops. One to oats. One to rye. And one to mustard. I am experimenting with each cover crop. I can cut them down and plant into the bed at any time.

Also, you can see some minibeds with Solar Pyramids in the background of the picture (some of the minibeds on the right have not been positioned and staked in place yet).

(click on any of the pictures to see larger views)


Ralph Borsodi's Advice
For Surviving Economic Disaster
(Part 11)

Dateline: 26 April 2017


This essay is part of a series about Ralph Borsodi and his book, Inflation is Coming And What to Do About ItClick Here to go to the beginning of this series.

###


The Conclusion...


Some Final Thoughts

Ralph Borsodi was incorrect. The "worst financial disaster in history" did not come to America after he wrote his book, or even in his lifetime. 

But, make no mistake about it, Americans have been hammered by inflation to some degree since Borsodi warned about it. And, as we all know, government debt has soared to levels that can never be repaid.

The hyperinflationary day of reckoning Borsodi predicted may still be ahead of us. And like every hyperinflationary crisis in history, most people will be ill prepared to deal with it.


Ralph Borsodi's Advice
For Surviving Economic Disaster
(Part 10)

Dateline: 21 April 2017


This essay is part of a series about Ralph Borsodi and his book, Inflation is Coming And What to Do About ItClick Here to go to the beginning of this series.

###


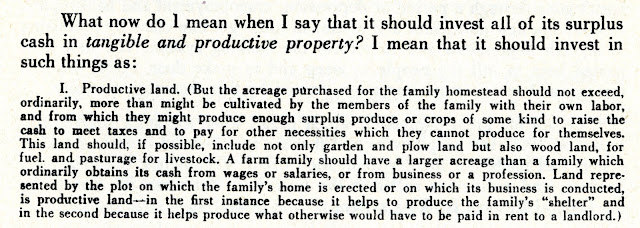
In the previous part of this series, Ralph Borsodi urged Americans with money in the bank to withdraw it and convert it into tangible and productive property. In this excerpt, he provides many examples...


After this part of the book (of which there is more than I have shared with you here), Borsodi discusses the matter of what a family should do with its stocks and bonds in order to avoid their becoming worth less and less as inflation comes. His concedes that in a time of inflation, good quality stocks in companies with a record of profit can pace inflation. However, his advice is best summed up in these excerpts...


From the subject of stocks and bonds, Borsodi moves into the matter of life insurance. He is not opposed to having life insurance, but he is opposod to purchasing life insurance policies that have  "compulsory investment elements" in them. He advises that such policies be cashed out and the money used to purchase productive property (as outlined above). Then, purchase Term life insurance.

I'll share Ralph Borsodi's final words of advice from this book in the next part in this series.

To go to Part 11 (the conclusion) 
of this series.


Ralph Borsodi's Advice
For Surviving Economic Disaster
(Part 9)

Dateline: 20 April 2017


A Old-Fashioned American Bank Run.


This essay is part of a series about Ralph Borsodi and his book, Inflation is Coming And What to Do About ItClick Here to go to the beginning of this series.

###


Click on the above pictures to see enlarged views.


As you can see, Ralph Borsodi was a prepper before prepping was cool. In the next installment he gives suggestions for how to "invest" all that money you take out of the bank.

To go to Part 10 of this series